How to Fix Water-Damaged Drywall Like a Pro
Mastering the Art of Drywall Restoration:
A Comprehensive Guide
Water damage is a common household woe that can wreak havoc on your home's structural integrity and aesthetics. Whether it's from a burst pipe, leaky roof, or flooding, water damage can quickly turn your once-pristine drywall into a soggy, unsightly mess. However, fear not, as fixing water-damaged drywall is a task that can be tackled with some patience and the right tools. In this article, we'll guide you through the steps to restore your damaged drywall and make your walls look as good as new.
Materials You'll Need:
- Safety Gear: Safety goggles, gloves, and a dust mask.
- Utility Knife: For cutting away damaged areas.
- Drywall Saw: To make precise cuts in the drywall.
- Screwdriver: For removing screws or nails from the damaged drywall.
- Drywall Compound: To patch and smooth the damaged areas.
- Drywall Tape: For reinforcing seams.
- Joint Compound: For finishing and blending patches.
- Sandpaper: To smooth the patched areas.
- Primer and Paint: To finish the repair and match your wall's color.
Step 1: Safety First
Before you start repairing your water-damaged drywall, ensure your safety. Put on safety goggles, gloves, and a dust mask to protect yourself from potential hazards like dust and mold spores.
Step 2: Assess the Damage
Identify the extent of the damage. Water-damaged drywall can range from minor surface issues to extensive structural problems. If the drywall is severely compromised, it may need complete replacement, but minor damage can often be repaired.
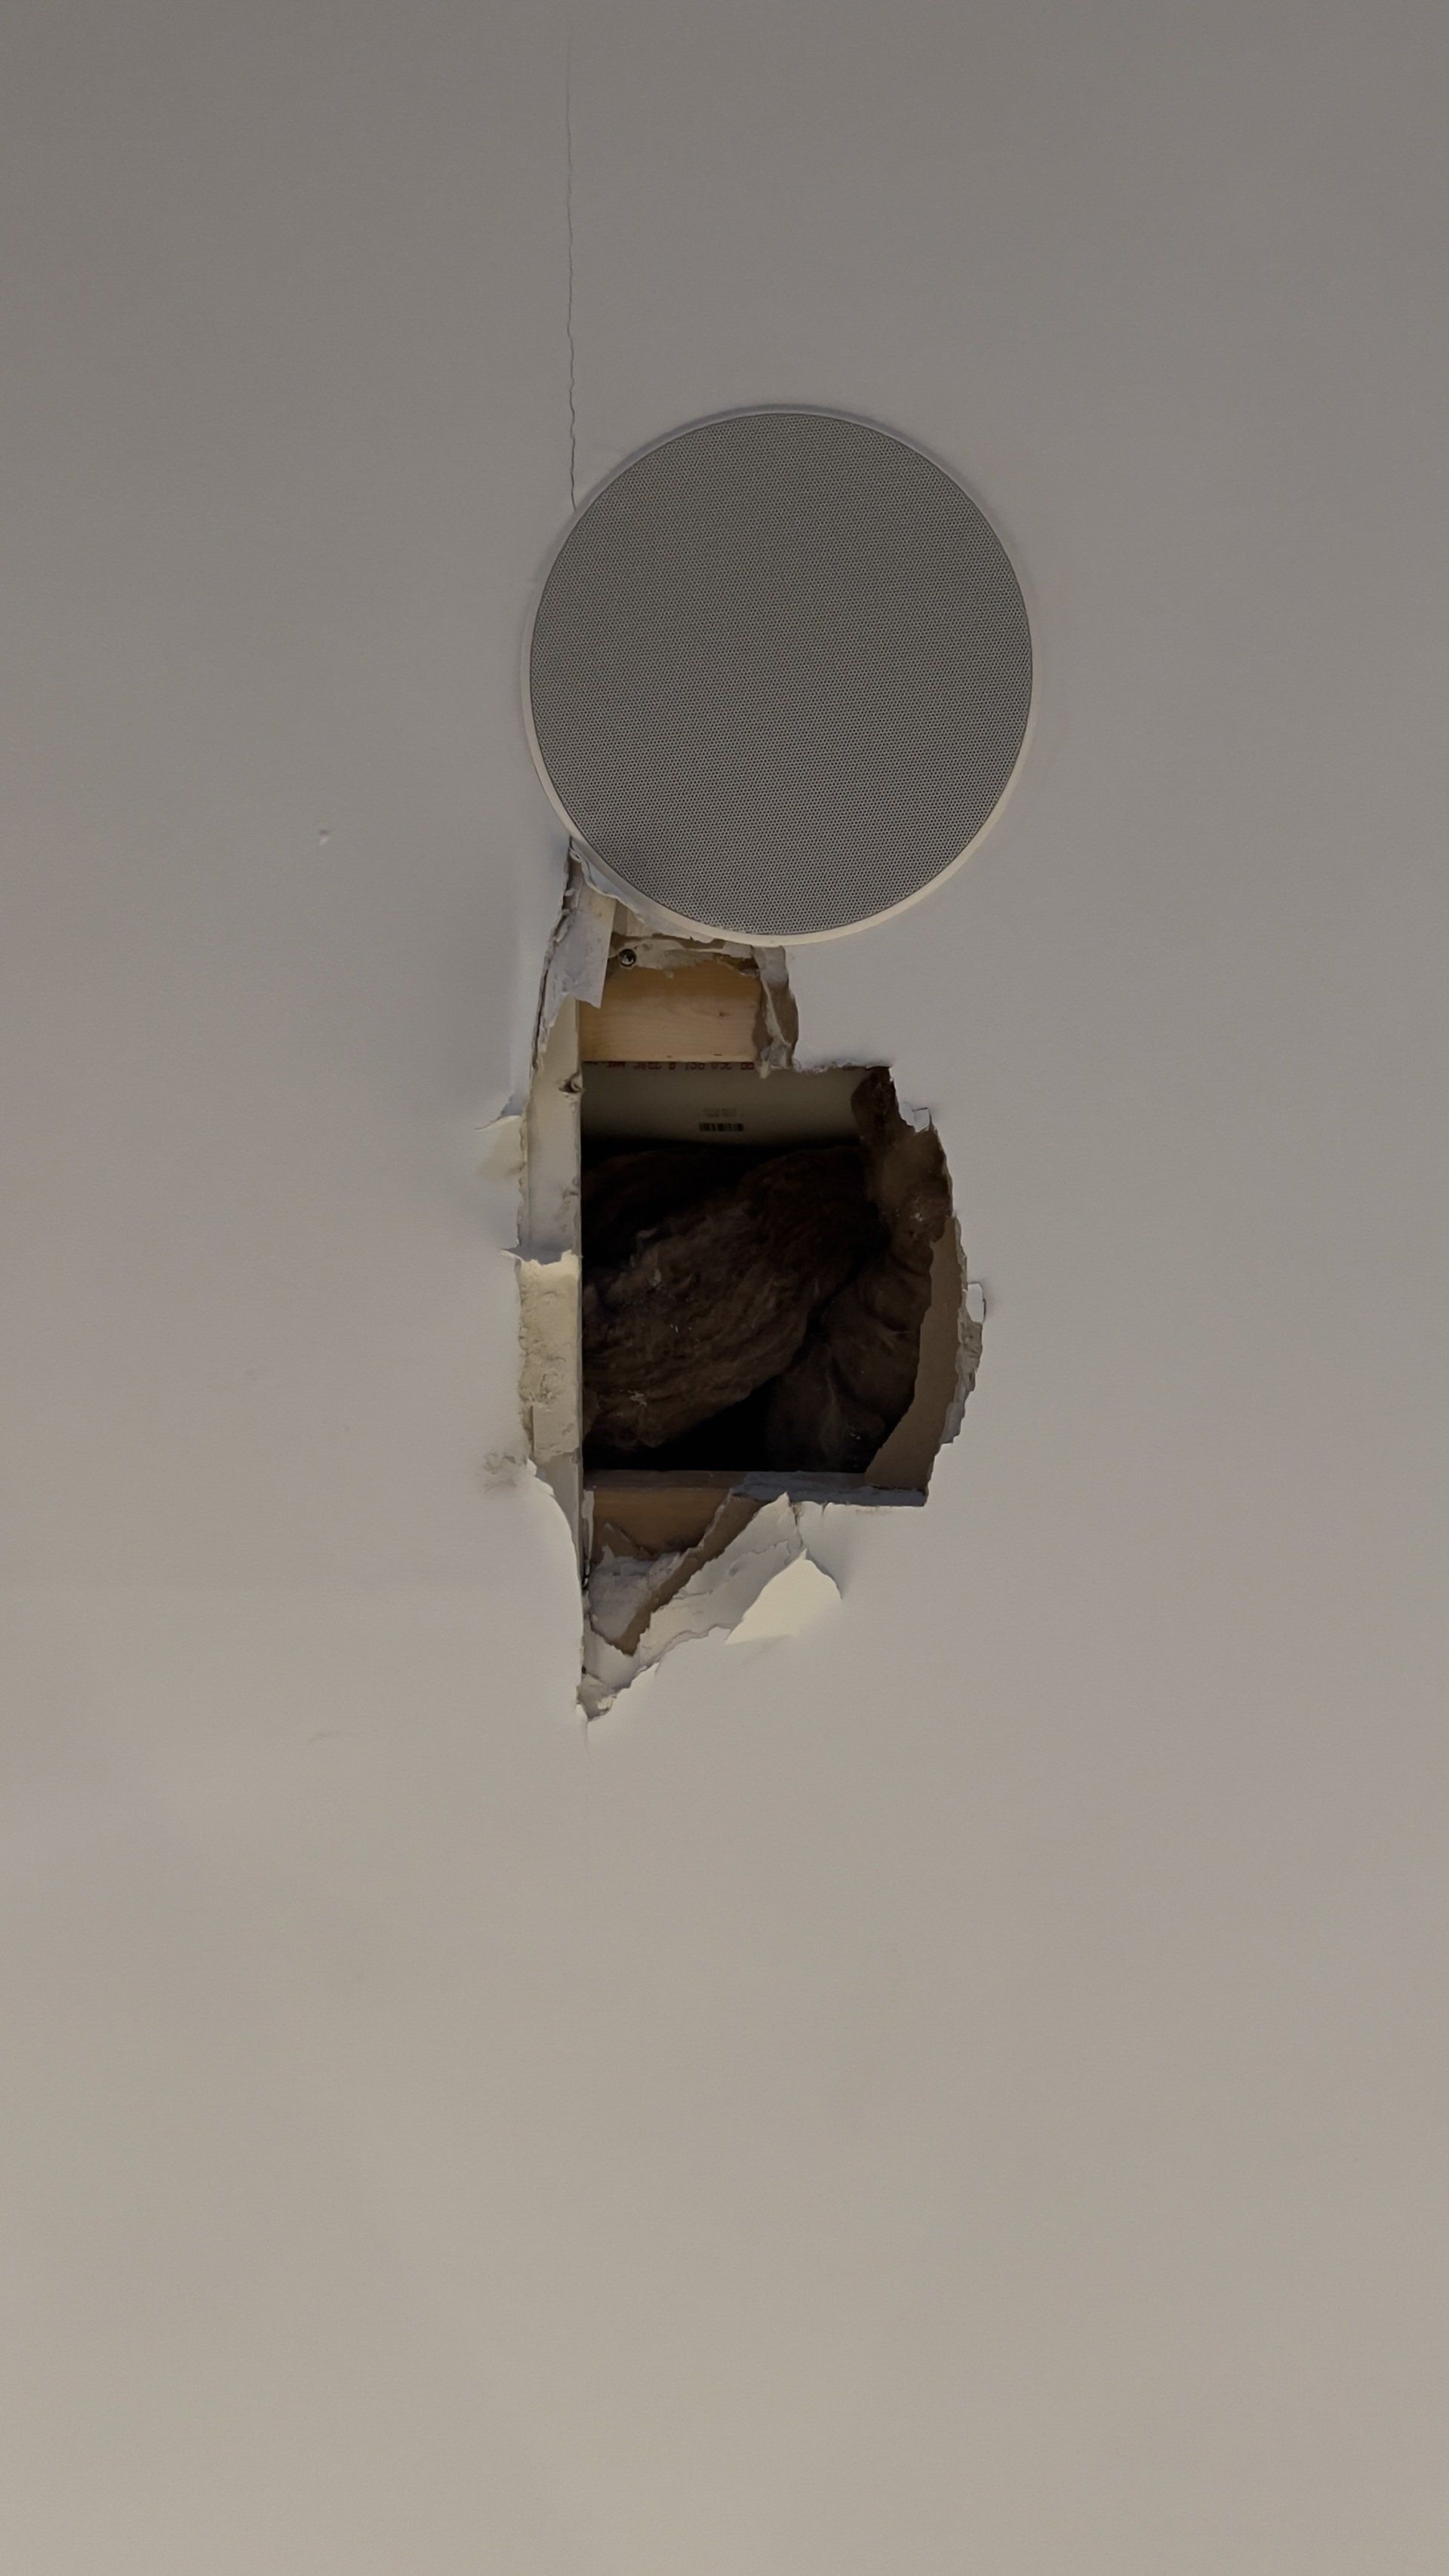
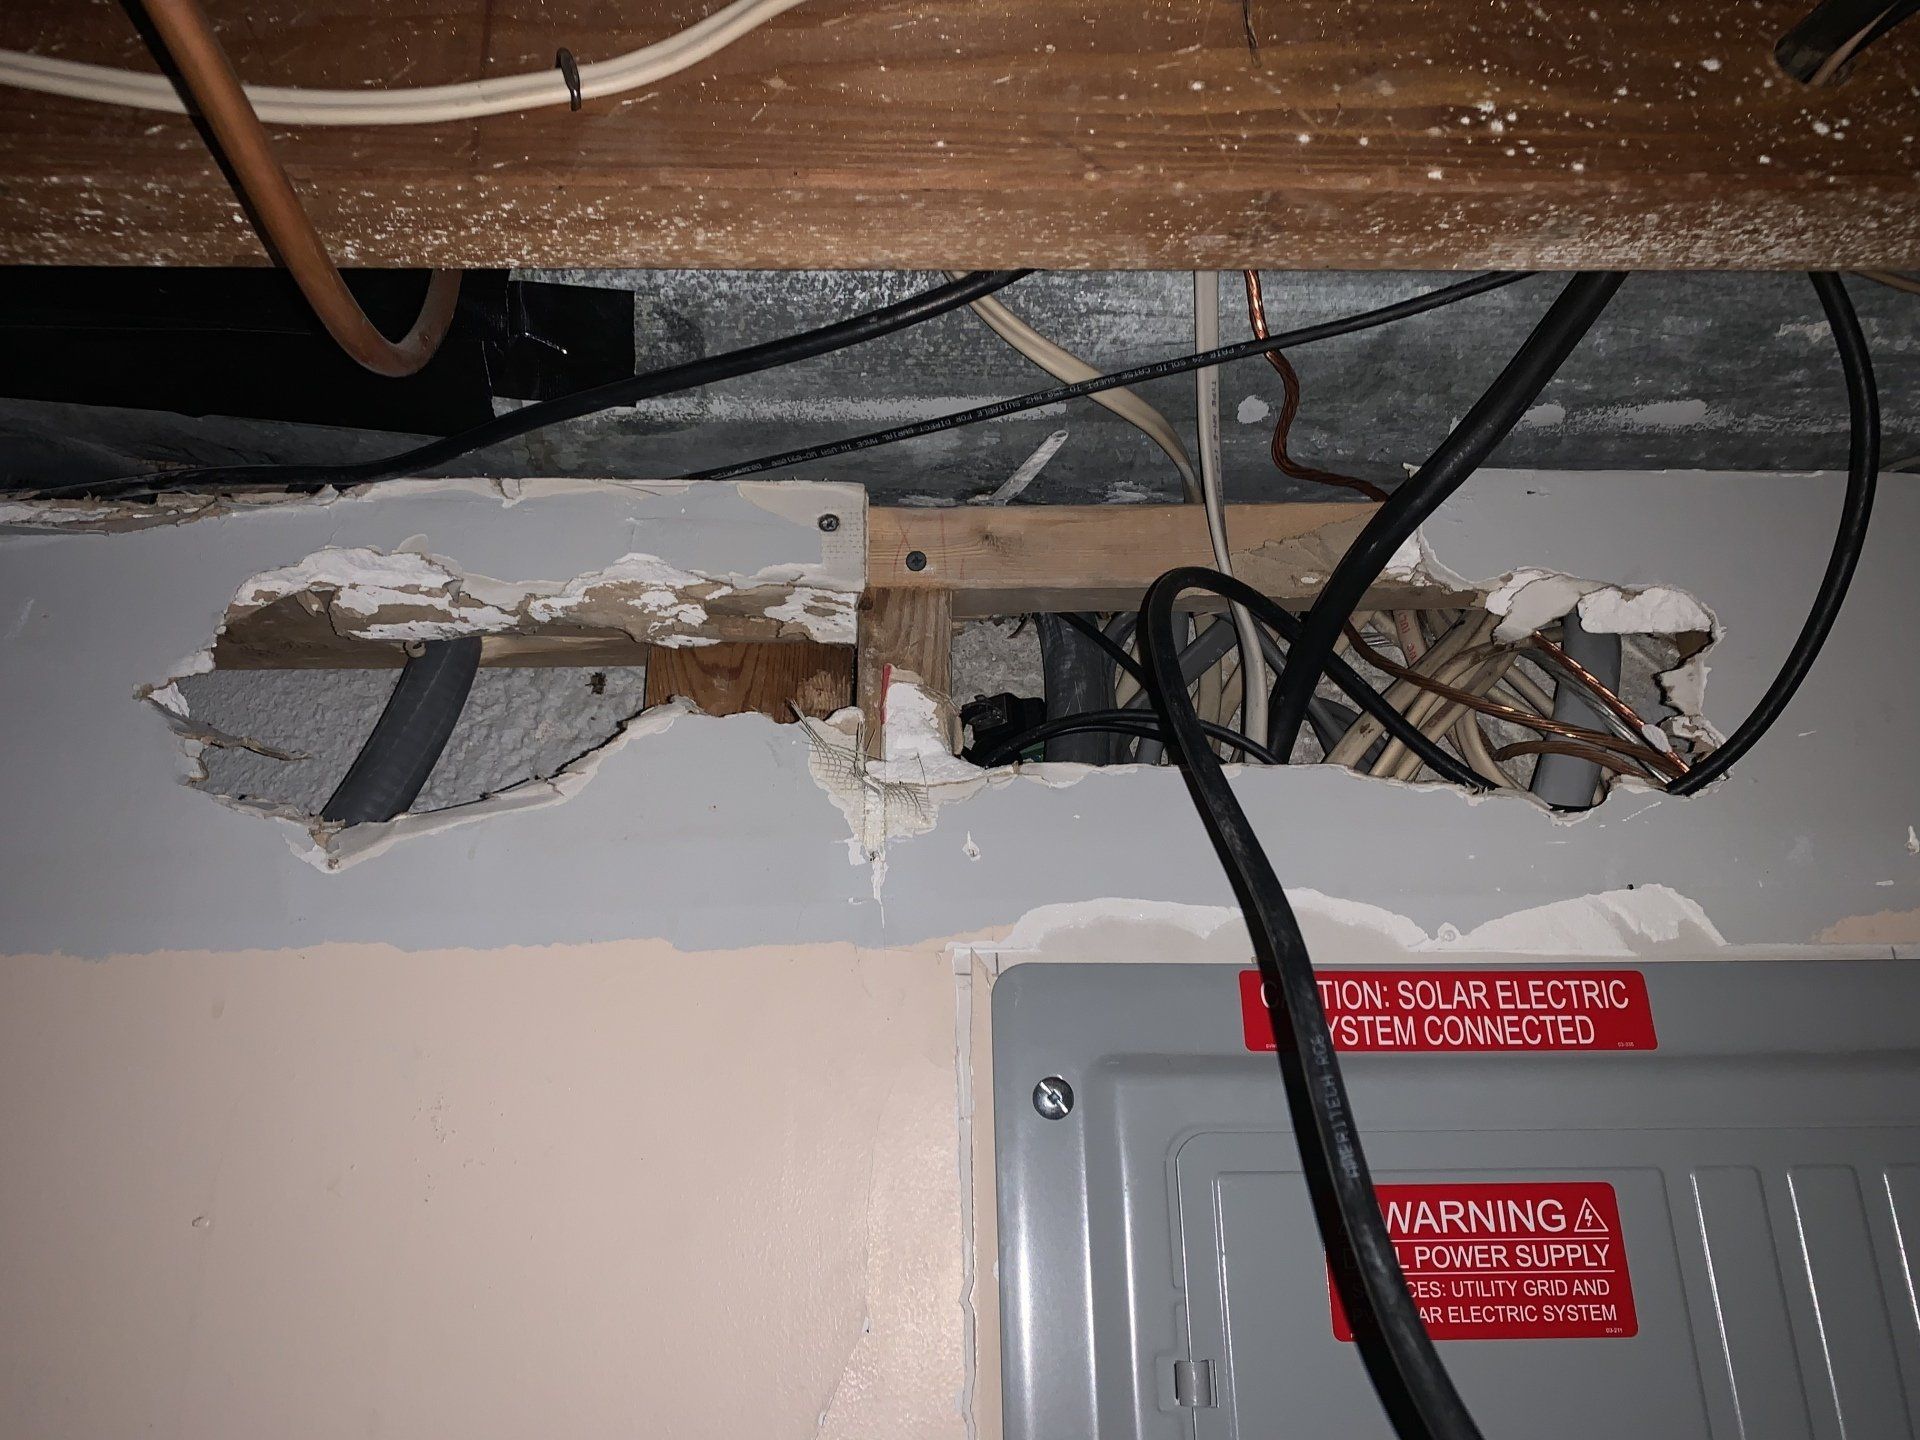
Step 3: Remove Damaged Material
Use a utility knife or drywall saw to carefully cut away any damaged or soggy drywall. Make sure to cut beyond the visibly damaged area to ensure you remove all compromised material. Be cautious not to damage the surrounding undamaged drywall.
Step 4: Inspect for Mold
Water damage often leads to mold growth. Inspect the exposed areas for mold. If you find mold, it's crucial to remove it properly. You may need to consult a professional for mold remediation if it's extensive.
Step 5: Reinforce the Area
If you've cut away a section of drywall, attach wood backing to the exposed studs to create a stable foundation for your new drywall patch. Use screws to secure the backing in place.
Step 6: Apply Drywall Tape
For seams or gaps in the drywall, apply drywall tape over the joint. This tape helps create a smooth, seamless finish. Press it into a thin layer of joint compound.
Step 7: Apply Drywall Compound
Using a putty knife, apply a thin layer of drywall compound over the tape and any areas you've cut or damaged. Let it dry according to the manufacturer's instructions. You may need to apply multiple coats, sanding between each layer for a smooth finish.
Step 8: Sand and Feather
After the compound has dried, use sandpaper to smooth the patched areas and feather the edges to blend them with the surrounding wall. Wipe away dust with a damp cloth.
Step 9: Prime and Paint
Once the patched areas are smooth and dry, apply a coat of primer to ensure a consistent finish. After the primer dries, paint the repaired area to match the rest of the wall. This final step will make your water-damaged drywall repair virtually invisible.
Conclusion
Repairing water-damaged drywall may seem like a daunting task, but with the right materials, some patience, and attention to detail, you can restore your walls to their former glory. Remember to prioritize safety, assess the damage carefully, and follow each step meticulously. While minor repairs can be a DIY project, for extensive water damage, it's advisable to consult a professional to ensure your home remains structurally sound and free from mold. With the right approach, your home will soon be free from the unsightly reminders of water damage.
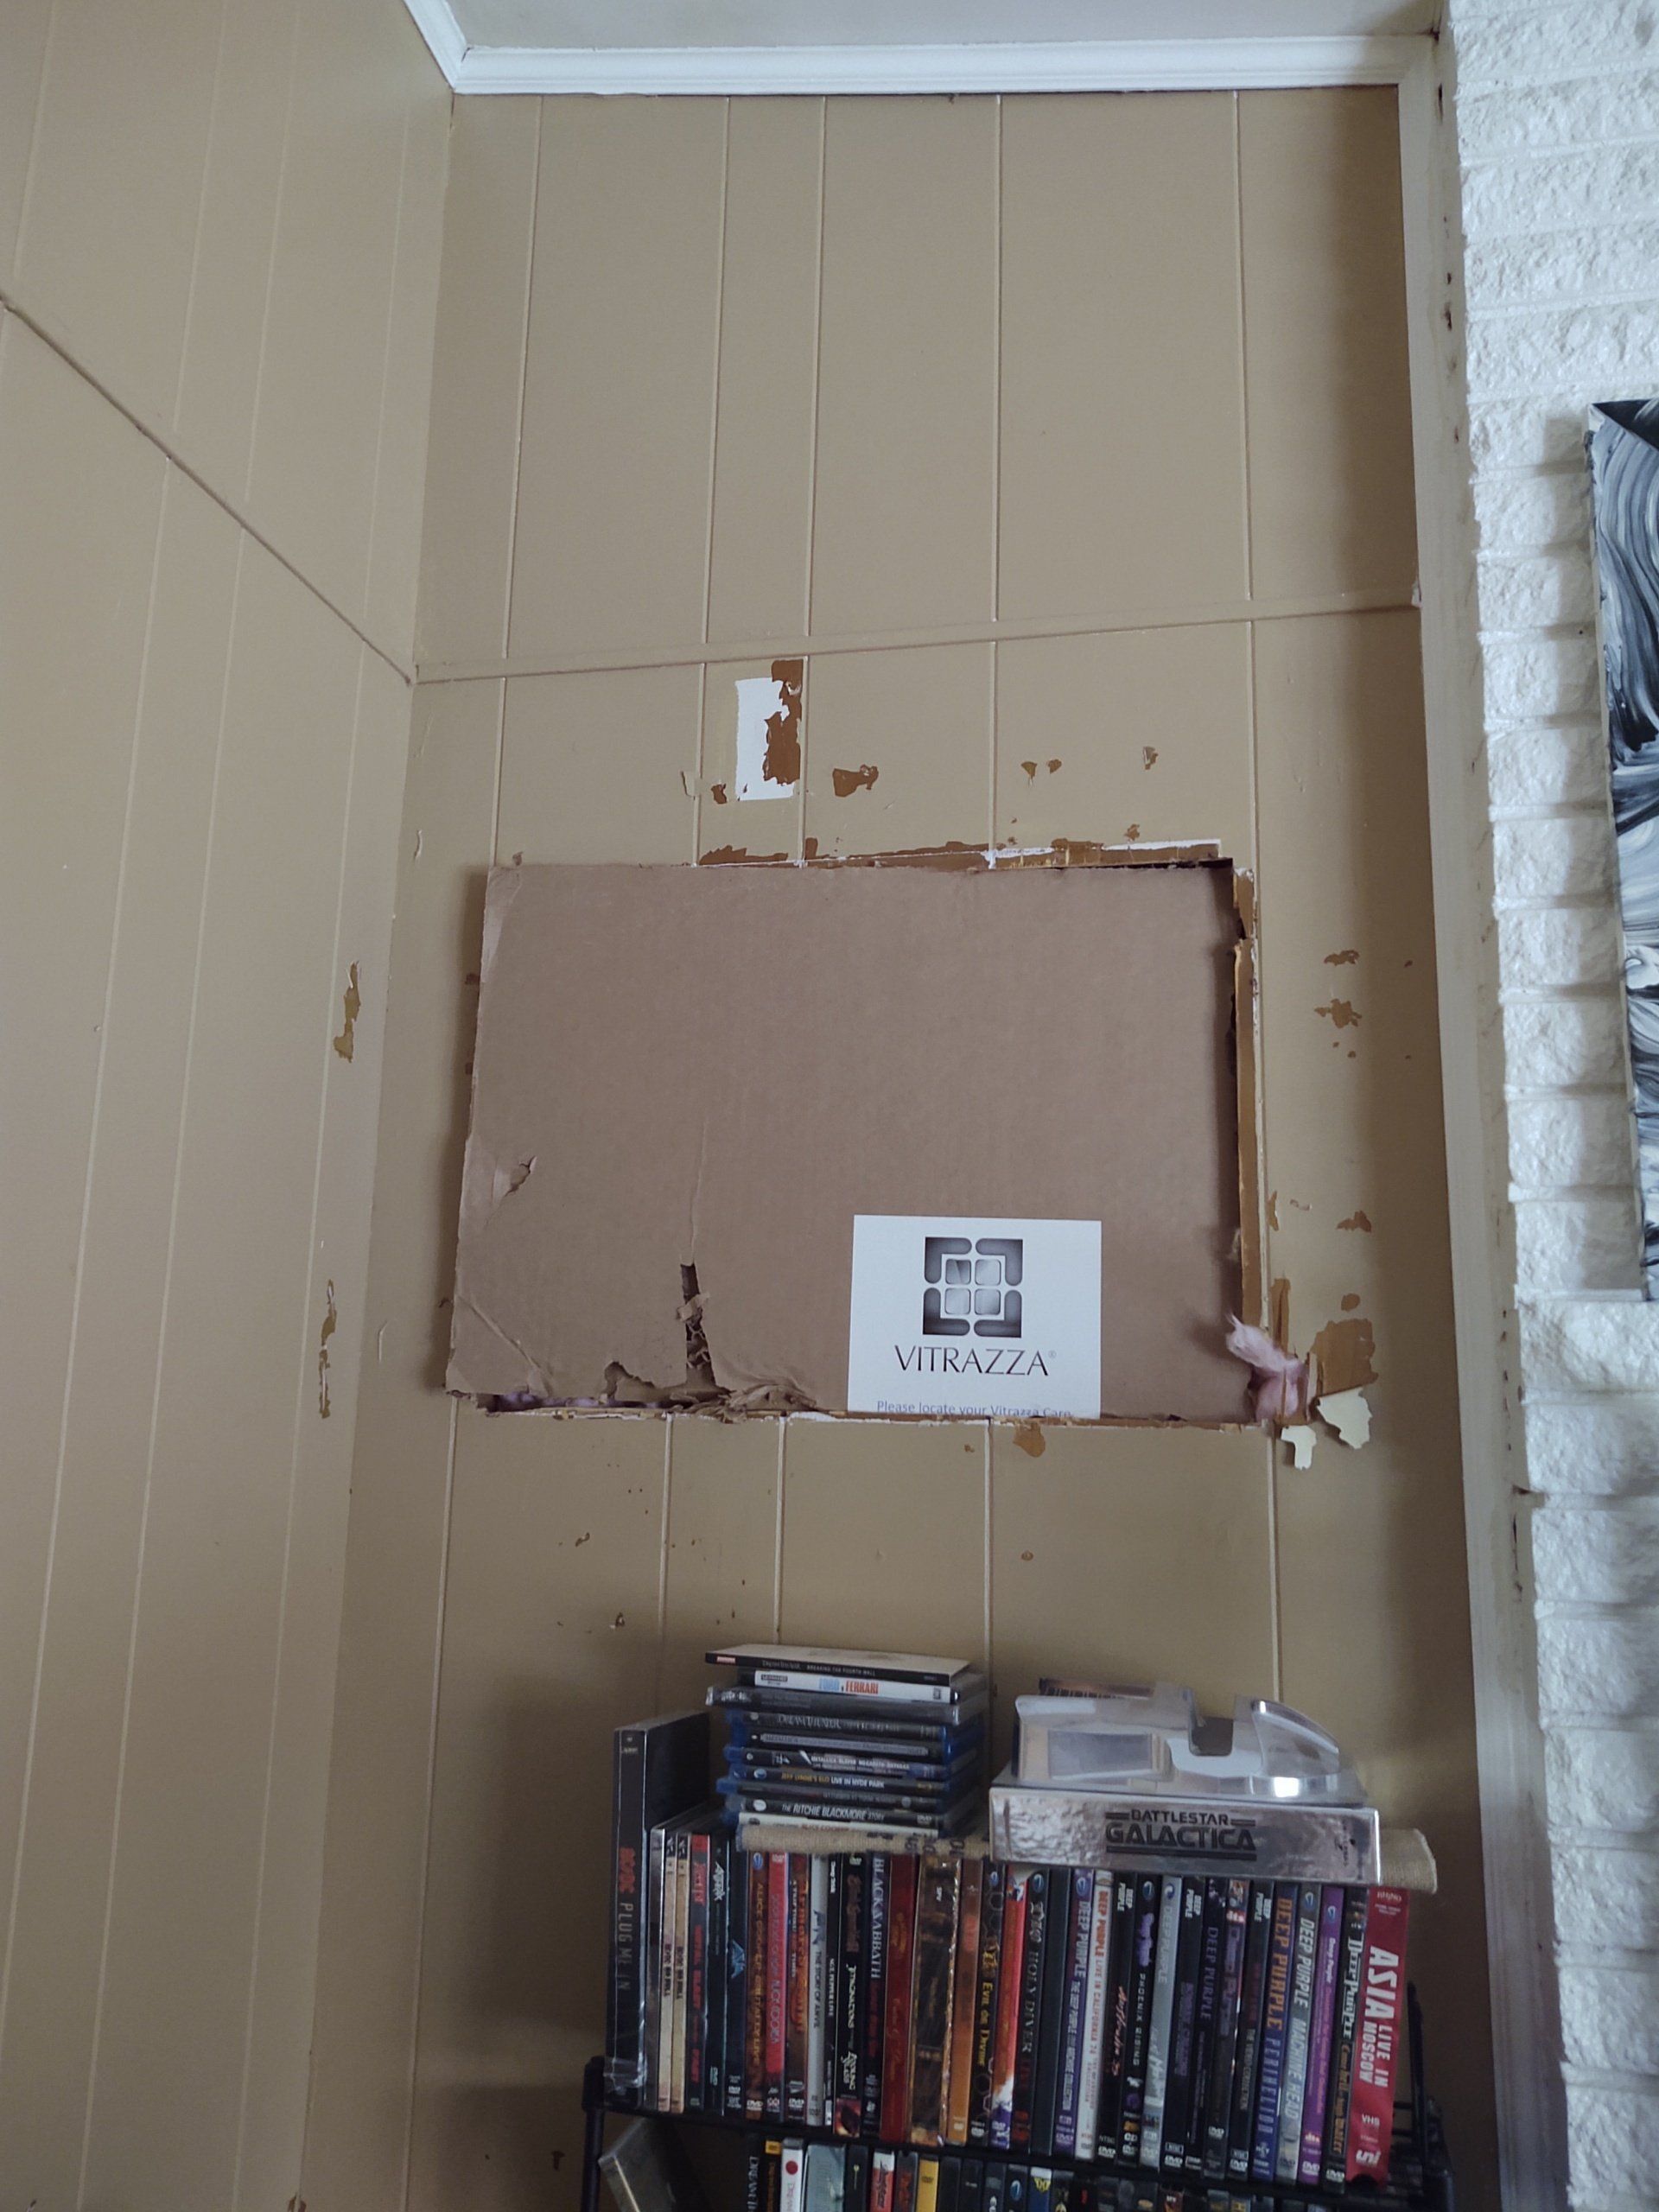
Steps to Cut Out the Affected Area
Fixing water damaged drywall is essential to prevent further damage and maintain the integrity of your walls. One effective method for repairing water damaged drywall is by cutting out the affected area. Here's a step-by-step guide on how to approach this task:
1. Assess the damage: Before you start cutting, examine the water damaged drywall thoroughly. Look for signs of mold, soft spots, or discoloration. It's important to ensure the damaged section is dry before proceeding with any repairs.
2. Gather the necessary tools: To cut out the affected area, you will need a utility knife, a drywall saw, a tape measure, a pencil, and safety equipment such as goggles and gloves. Make sure you have all the tools readily available to ensure a smooth process.
3. Mark the area: Use a tape measure to identify the boundaries of the damaged area. It is advised to cut out a rectangle or square shape to make it easier to replace with a new piece of drywall. With a pencil, mark the lines where you will make the cuts.
4. Score the damaged area: Using a utility knife, score the drywall along the marked lines. Apply firm pressure while cutting, ensuring you only penetrate the drywall's surface and not the surrounding areas. This step helps create clean edges for an easier removal.
5. Cut out the damaged section: With a drywall saw, carefully cut along the scored lines to remove the damaged piece. Start with the top line and work your way down, ensuring a neat and even cut. Take caution not to damage any electrical wires or plumbing behind the drywall.
6. Remove debris and clean the area: Once the damaged section is removed, clean up any debris and dust left behind. You can use a vacuum cleaner or a brush to clear the area, ensuring a clean surface for the next steps.
Cutting out the affected area is the initial step in repairing water damaged drywall. After this, you will need to proceed with replacing the removed drywall section, applying joint compound, sanding, and eventually painting. Remember to take safety precautions during the entire process and, if necessary, consult a professional for guidance.
Ready to work with Fort Worth Drywall Contractor Services?
Let's connect! We’re here to help.
Send us a message and we’ll be in touch.
Or give us a call today at 111-222-3333
Agency Contact Form
More Marketing Tips, Tricks & Tools